![telling [fashion] stories™](http://images.squarespace-cdn.com/content/v1/63a9ea2013a1ad2ae87f3e38/a20e9ba5-15d5-4fc5-b1bf-697074940e0e/t%5Bf%5Ds+logo_bright.png?format=1500w)
beyond a [beautiful] shot
understanding the difference between photo development and retouching

How to develop a photo in the digital age
Who still remember the magic of the darkroom alchemy?
I have been lucky to start my journey into photography when film cameras where usual stuff, not just rarity for nostalgic people.
Therefore to me, the transition to the digital age has changed the tools used, but not the concepts and methodologies.
That certainly helps to understand the postproduction process, which somehow follows the same steps of an image shot on film.
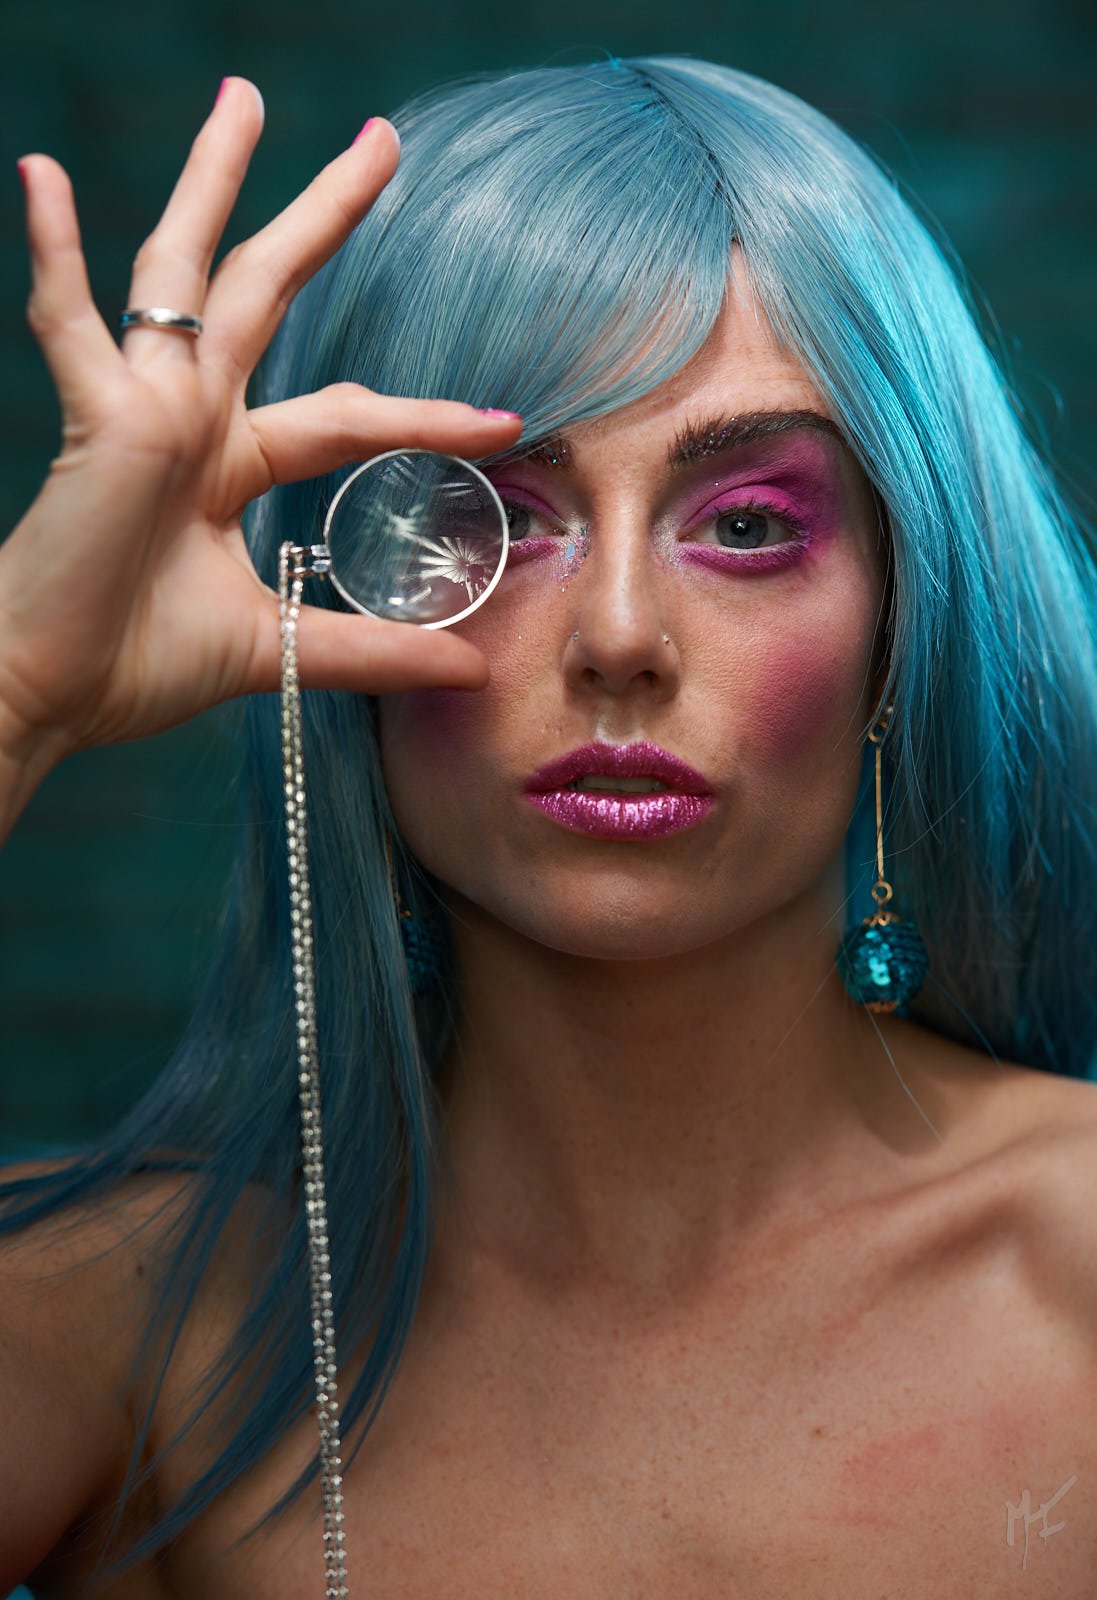
The following is a short explanation of the whole process, from camera to print (or to screen). As an example, I am using a beauty shot taken a few years ago of Jessica Michelle Joyce, model from Rochester, NY.
step 0 // shoot
Once decided the look, posing, framing and lighting (not part of this essay), I tend to shoot a bit underexposed (half to a full stop) to preserve highlights and colour saturation.
Underexposing is essential if you have coloured gel lighting bathing the scene, particularly red, as they tend to change hue quite easily when the exposure is too bright (i.e. reds become yellows).
If you shoot tethered – which I strongly advise – it is easy to check exposure and colour calibration on the computer screen.
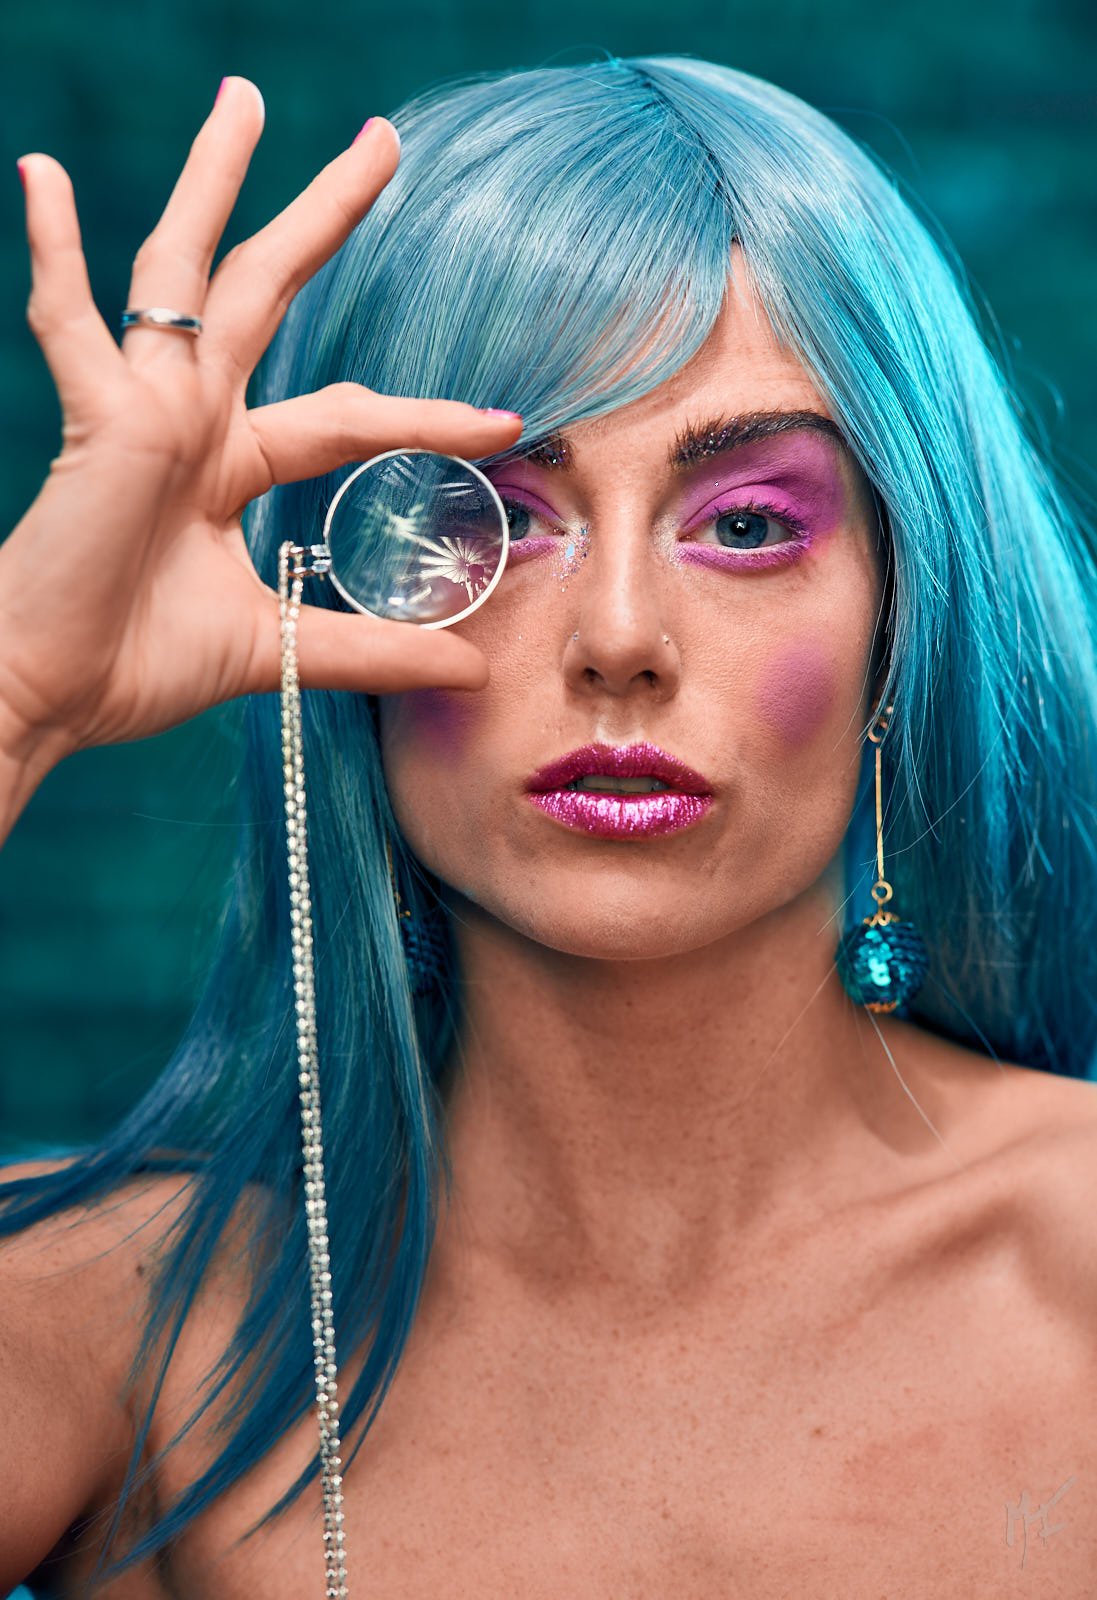
step 1 // development
The first step of a photo editing process is developing the image, adjusting the colour temperature (white balance) and exposure.
Never forget to take a test shot with a grey card, which allows setting the white balance correctly, regardless of the colour temperature of the lighting sources.
step 2 // colour correction
You may want to check at this stage that all the colours in the scene are precise as you desire. In this example, the pink make-up on cheeks and eyes was shifting to a darker purple. Then a selective adjustment on specific colours brings back the original hue.
You can use the same technique to change a colour deliberately into another one, if not too distant in the colour wheel (you need to have a few colour theory notions if you want to achieve a harmonic palette).
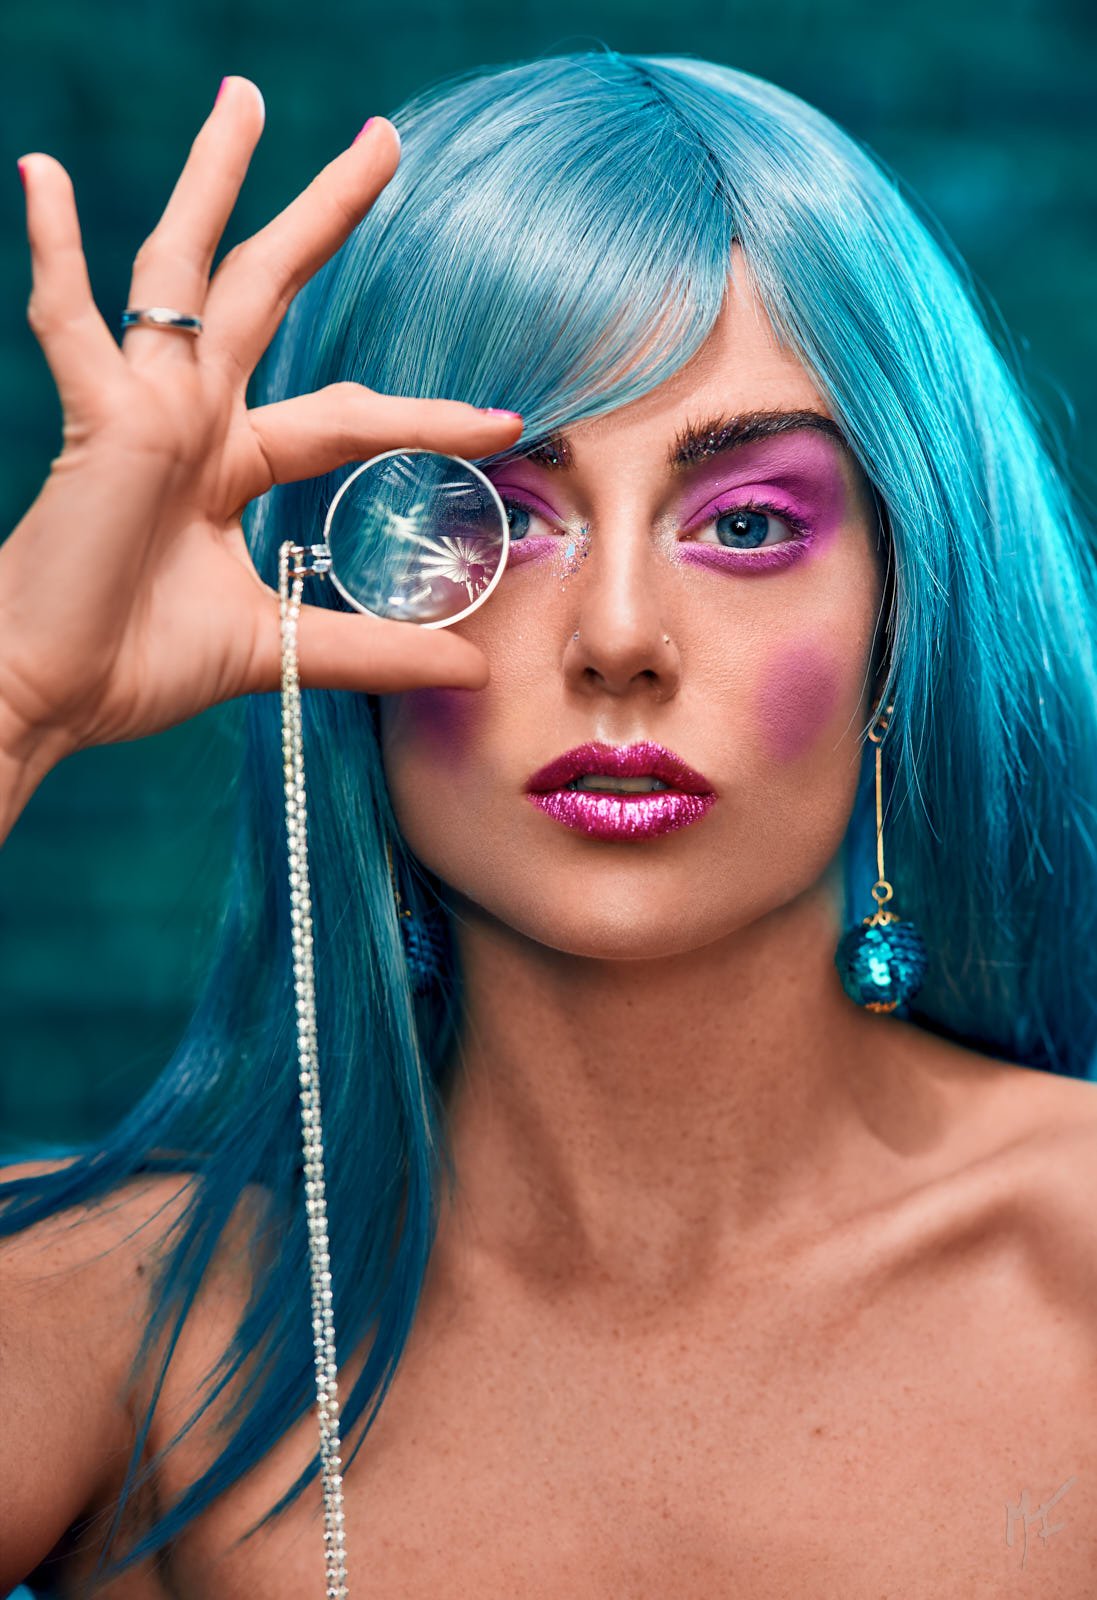
The importance of a balanced retouching
The next phase is the very skilled art of photo retouching. As this is a very accurate and time-consuming operation, I prefer to delegate it to Julia, our talented image retoucher, who is also explaining here the essential steps.


step 3A // skin smoothing
Although beauty images show us flawless skin, nobody is perfect! Even the most beautiful model and the most talented make-up artist can't assure that industry standard.
The photographic retouching, when done correctly, removes imperfections like blemishes and spots while preserving the natural details of the model's skin.
The two main techniques we use are the healing brush and the frequency separation, where contrast and colour on the skin are independently adjusted.
step 3B // hairstyling
A professional stylist on set ensures that the hair is right just before the shot. However, there is always the annoying stray of hair to remove or to adjust in postproduction. Then, we use the clone stamp and the standard brush tools to put back in place the best hairdo.
step 3C // sculpting the figure
As a final retouch, the dodge & burn technique – brightening and darkening specific areas – helps to sculpt the model's features as desired. As an example, darkening the cheekbones or brightening the area under the eyes improves the overall look of a beauty shot like this one. Hair volume and other body parts benefit from dodging and burning as well.
Retouching is not only essential on beauty shots. It is also a useful process to adjust garments and other elements in the scene.
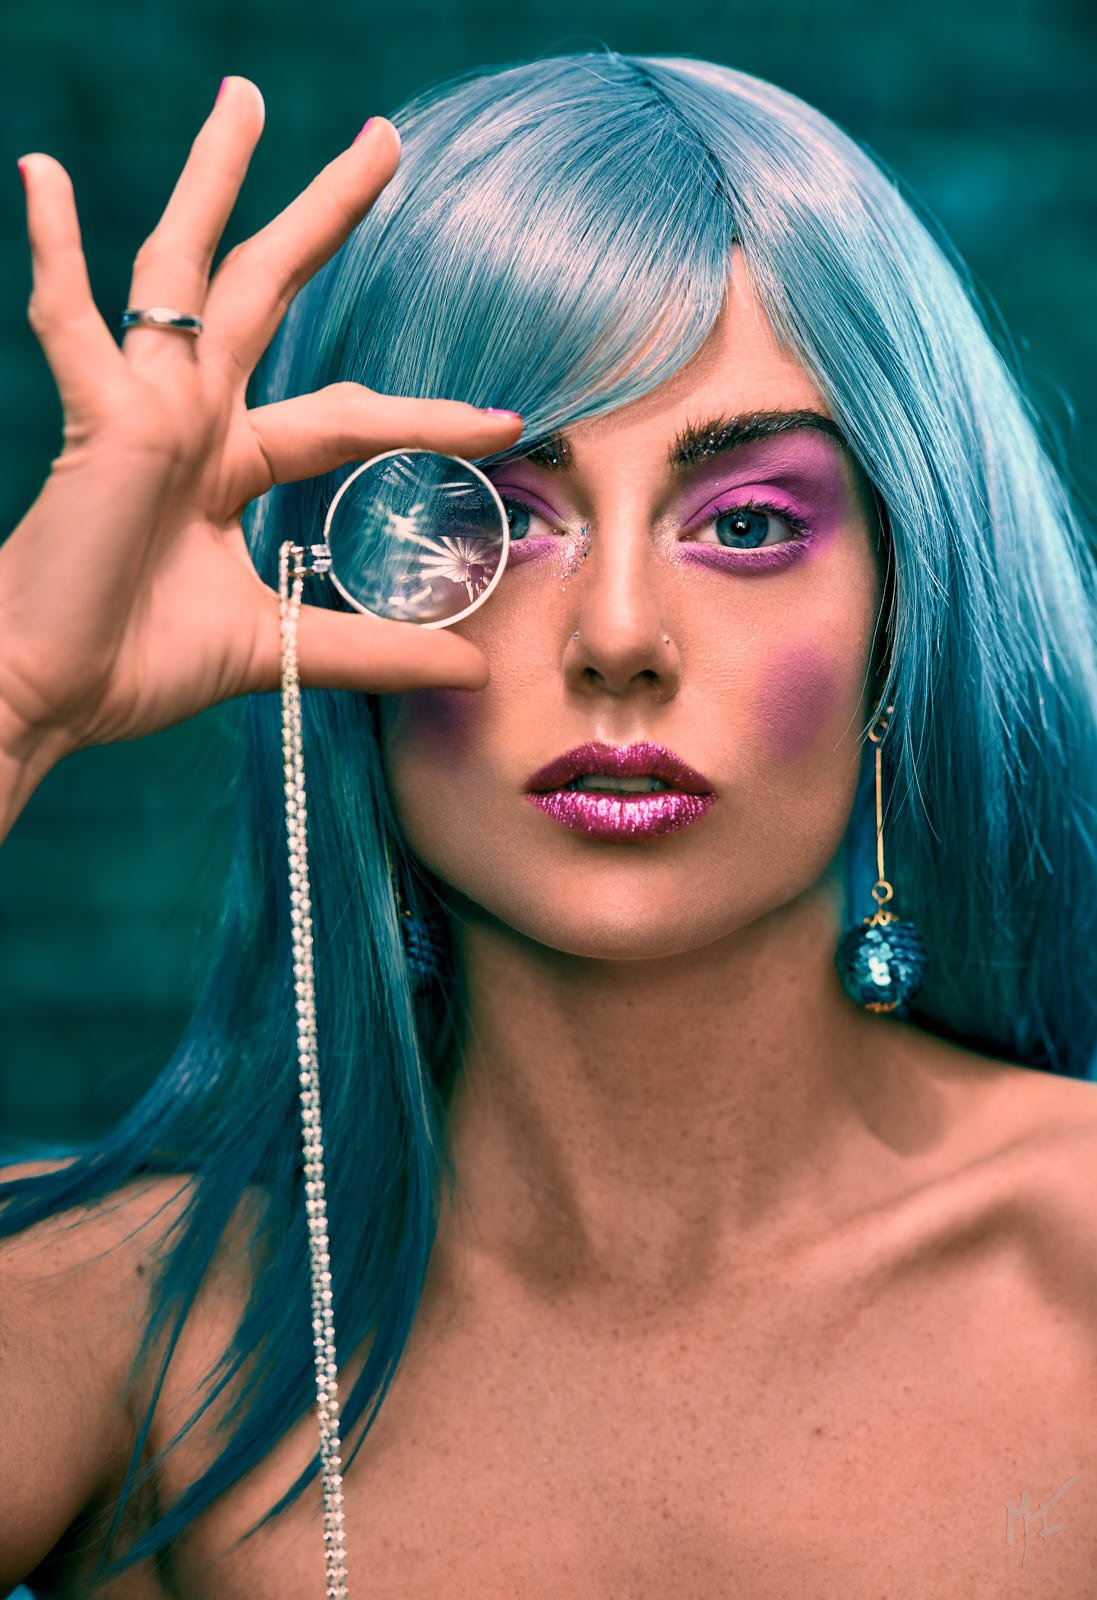
The personal touch
After development and retouching as seen above, the image could be considered final by many photographers. However, I like to add a final touch, which is a matter of personal taste.
step 4 // colour grading
Sometimes this aspect is called cinematic look because it is a process used on digital film to alter the colours and give a feel to the movie picture as it was shot on film... Ahah, notice how, in the end, we always refer back to the old times of the film cameras!
We love that! Then, always careful to preserve colours of the products as they should be, we fine-tune the colours on shadows, mid-tones and highlights using selective controls.
The best tool we have found, although expensive, is the Trackerball element by Tangent Wave. The most intuitive and easy to use tool to achieve the desired colour grading on any image.
the final image
Concluding, you can see how many steps a photo editing process has. This is why we always say NO when a client asks unedited images.
If you were a wise winemaker, would you put your grapes in bottles just after the harvest, before proper crushing, pressing and fermentation?
À votre santé!
– mjf
credits
modelling // Jessica Michelle Joyce
photography & editing // Marco Fazio
photo retouching // Julia Antsibor